
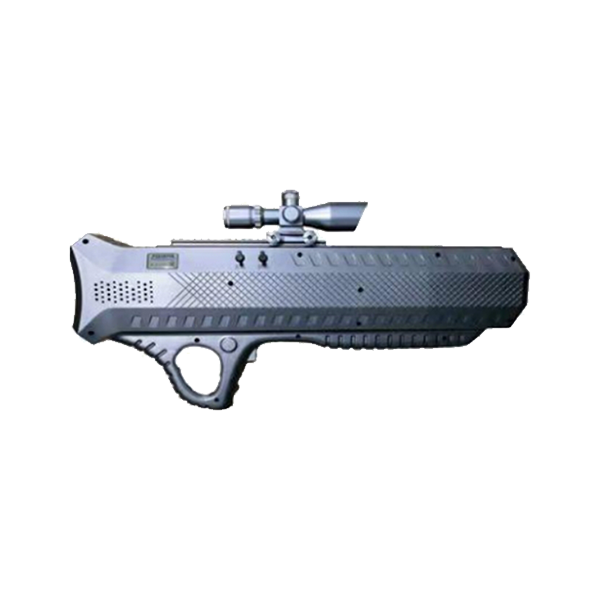

Product Details
This product is a handheld drone jammer independently developed by our company. This device can interfere and shield all GNSS satellite positioning signals, including: GPS/Beidou/Glonass/Galileo; at the same time, it can also interfere and shield the commonly used ISM 2.4G and ISM 5.8G frequency bands of drones, causing the remote control, video transmission and positioning signals of the drones to be interrupted, making the drones lose control of the remote controller and achieving the effects of forced landing, return to base or hovering. This system has the features of long-range interception, simple operation and convenient carrying, and is suitable for various security fields such as prisons, detention centers, drug rehabilitation centers, examination venues, and confidential institutions.
Device Mode:
"88%": The battery is 88% discharged.
"Device Standby": Device standby mode, where only the screen is illuminated but no interception signals are emitted.
"Return-to-Land Mode": This mode will only be activated after the trigger is pulled. In this mode, the aircraft will automatically return to land. There is a slow vibration sensation at the trigger area.
"Emergency Landing Mode": This mode will only be displayed after the trigger is pulled. In this mode, the aircraft will land on the spot, and there will be a rapid vibration sensation at the trigger location.
Equipment parameters:
Objective lens
2. Red laser emission port
3. Battery compartment
(Battery model: CR2032)
(2) Installation direction: Battery + pole facing the battery cover
4. Adjustment of the red and green light switch inside the sight scope
(3) The numbers represent the brightness. The larger the number, the higher the brightness.
(4) G and R represent the turning off of the red light and the green light.
5. Battery compartment
(5) Battery model: LR1130
(6) Number of batteries: 3
(7) Installation direction: Battery + pole facing the battery cover
6. Laser button switch
7. Base slot
8. Eyepiece
10. Refractive adjustment (Adjust the knob switch according to the actual usage environment until the image is clearest)
11. Magnification adjustment (2.5 - 10) times
12. Up and down adjustment of the viewing area
13. Adjust the left and right boundaries of the viewing area (! During adjustment, the outer cover needs to be unscrewed)
14. Once this lid is opened, the adjustment function is the same as that of the 12 model. It is not recommended to make any adjustments as they have already been set by the factory.
Copyright © 浙江翔龙航空科技有限公司 浙ICP备2025164949号-1 网站建设:木之信息